Navigation
Tree
The Tree is used to access all company related information, summary schedules and reports, and state/jurisdiction forms.
Tax Year and Company Dropdown
All data in the Company Information, Summary Schedules, and State/Jurisdictions sections is specific to the selected year and company.
The Company dropdown allows you to choose which company to view, with schedules and jurisdictions available based on the module type, state of domicile, and licensed jurisdictions provided during account setup. The Year dropdown allows you to view all forms available for the selected tax year.
Overview
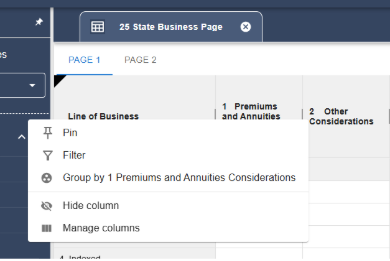
All schedules include tools to customize how data is viewed. Columns can be sorted alphabetically by clicking the arrow in the column header; up for ascending (A–Z) and down for descending (Z–A). Additional options are available via the three-dot menu in each column header. Here, you can pin columns to keep them fixed on the left, apply filters to show only specific rows, group rows with the same content into collapsible sections, or hide and manage columns to control their visibility.
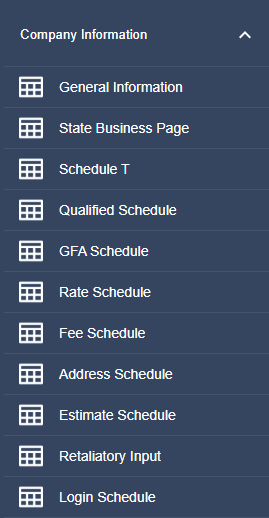
Company Information
The Company Information dropdown contains the General Information page, State Business Page, Schedule T, and various input schedules.
Summary Schedules
The Summary Schedules dropdown contains the Payment Request Schedule, Summary of Taxes, and Actions Report to provide a centralized view of information.
Please Note: Data entered in the Company Information schedules or Summary Schedules is not automatically saved. When a change is made a Save icon will appear on the vertical icon bar on the right-hand side of the screen, and you must click on that icon to save your changes. If you attempt to navigate away from a schedule that has changes that have not been saved, a pop-up window will warn you and remind you that data has not been saved.
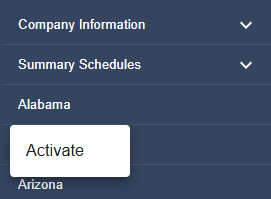
State/Jurisdiction
All available jurisdictions will be displayed in the navigation tree. If the jurisdiction has active forms, there will be a down arrow next to the name of the state.
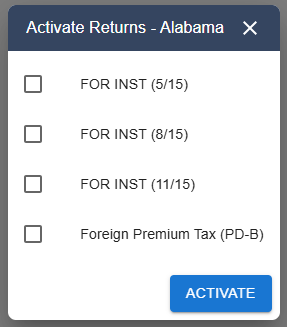
To activate a jurisdiction, right-click on the jurisdiction name in the tree and select “Activate”. This will bring up a list of inactive forms for the jurisdiction. To activate a form, check the box next to the desired form’s name and click “Activate”. You can activate a single form or multiple at the same time.
If an active form is no longer needed, it can be deactivated by right-clicking on the form name and clicking “Deactivate”. A pop-up will appear asking you to confirm your decision.
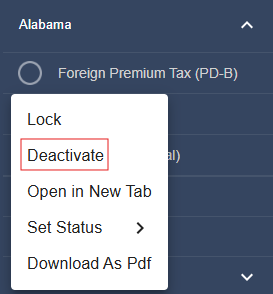
Please Note: Deactivating a form will delete all data entered. The form can be activated again, but previously entered data cannot be recovered.
All active forms will rollover from one year to the next.
Keyboard Navigation
Key | Action |
Tab | Move to next editable cell |
Shift+Tab | Move to previous editable cell |
Enter | Confirm entry and move down |
Escape | Cancel current edit |
Arrow Keys | Navigate between cells |
Ctrl+S | Save current schedule |